3. Nginx Server Setup
Now we have configured a generic Linux server on your machine depending on the OS you’re running.
In this guide, we’ll discuss how to install Nginx on your Ubuntu 18.04 server.
Open terminal in Ubuntu
TYPE the following commands
$ sudo su
$ [sudo] password for 'username':
# once you've entered your password you will have root permissions
Installing Nginx
$ sudo apt update
$ sudo apt install nginx
#After accepting the procedure, apt will install Nginx and any required dependencies to your server.
Adjusting the Firewall
$ sudo ufw app list
#You should get a listing of the application profiles:

output:
Available applications:
  Nginx Full
  Nginx HTTP
  Nginx HTTPS
  OpenSSH
# Nginx HTTP: This profile opens only port 80 (normal, unencrypted web traffic). You need to enable this

$ sudo ufw allow 'Nginx HTTP'
#You can verify by typing
$ sudo ufw status

output:
Status: active

To                         Action      From
--                         ------      ----
OpenSSH                    ALLOW       Anywhere
Nginx HTTP                 ALLOW       Anywhere
OpenSSH (v6)               ALLOW       Anywhere (v6)
Nginx HTTP (v6)            ALLOW       Anywhere (v6)

#You should see HTTP traffic allowed in the displayed output
Checking for webserver
$ systemctl status nginx

output:
nginx.service - A high performance web server and a reverse proxy server
   Loaded: loaded (/lib/systemd/system/nginx.service; enabled; vendor preset: enabled)
   Active: active (running) since Wed 2020-02-12 11:14:27 CET; 30 min ago
     Docs: man:nginx(8)
 Main PID: 2369 (nginx)
    Tasks: 2 (limit: 1153)
   CGroup: /system.slice/nginx.service
           ├─2369 nginx: master process /usr/sbin/nginx -g daemon on; master_process on;
           └─2380 nginx: worker process

#The service appears to have started successfull. You can access the default page Nginx landing page to confirm that the software is running properly by navigating to your server’s IP address.
Enter your server IP address
$ ifconfig

#This will give your IP
When you have your server’s IP address, enter it into your browser’s address bar:
http://your_server_ip or localhost
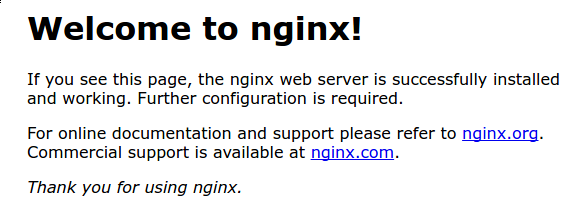
This should display the default Nginx landing page
Now you will have to set up the server blocks
Creating web directory for each host
$ sudo mkdir -p /var/www/html/example.com/public_html

#The above directory is owned by root user. We need to change the ownership to the regular user
$ sudo chown -R $USER:$USER /var/www/html/example.com/public_html
$ sudo chmod -R 755 /var/www/html/
#Here the $USER refers to you, the currently logged in user
Creating demo page for each Host
$ sudo nano /var/www/html/example.com/public_html/index.html
Add the following lines
<html>
 <head>
 <title>www.example.com</title>
 </head>
 <body>
 <h1>Hello! this page is to test for the static website</h1>
 </body>
</html>
Create configuration file for each host
$ sudo cp /etc/nginx/sites-available/default /etc/nginx/sites-available/example.com.conf
$ sudo nano /etc/nginx/sites-available/example.com.conf

output:
# Default server configuration
#
server {
listen 80 default_server;
listen [::]:80 default_server;

# SSL configuration
#
# listen 443 ssl default_server;
# listen [::]:443 ssl default_server;
#
# Note: You should disable gzip for SSL traffic.
# See: https://bugs.debian.org/773332
#
# Read up on ssl_ciphers to ensure a secure configuration.
# See: https://bugs.debian.org/765782
#
# Self signed certs generated by the ssl-cert package
# Don't use them in a production server!
#
# include snippets/snakeoil.conf;

root /var/www/html/example.com/public_html;

# Add index.php to the list if you are using PHP
index index.html index.htm index.nginx-debian.html;

server_name example.com www.example.com;

location / {
# First attempt to serve request as file, then
# as directory, then fall back to displaying a 404.
try_files $uri $uri/ =404;
}

#Edit line 27 and 32 accordingly in your terminal
Enable Nginx Server block
$ sudo rm /etc/nginx/sites-enabled/default
$ sudo ln -s /etc/nginx/sites-available/example.com.conf /etc/nginx/sites-enabled/
$ sudo systemctl restart nginx
Test Nginx Server block
$ sudo nano /etc/hosts

#Add all your virtual domain like below.
output:
[...]
192.168.225.24   example.com
[...]

#we do this beacuse this is your domain and we'll need to point it to the localhost server
The script that will do all of this manual work for you is here → script.sh (still to come)
to execute this
Name it something like:
script.sh.Make it executable:
sudo chmod 755 script.shRun it:
sudo ./script.sh example.com
Once you have all of this setup, you will have to send the following information to Rumie.
Provide Rumie:
Public IP Address of the Server
Username - Part 2
User Password - Part 2
Web Directory Root
Content Sync Schedule (UTC Time + Day(s) of the Week/Month)
Project ID it should be connected to
Rumie will use this information to access your server and sync Content
