Rumie Management Center (RMC)
- Tiffany Janzen
- Manav Chugh
- Kyle Lubieniecki (Unlicensed)
Rumie has launched the Rumie Management Center 2.0. This new version will allow you to manage your Libraries and Projects with ease. With the new user interface, you will be able to create, edit your new or existing Libraries in your Project and manage user roles in a sequential and seamless way.
This user manual will explain everything you need to know about the functionality of the Rumie Management Center so you can easily set up your Project with Libraries and start learning.
Table of Contents
RMC Roles and Permissions
The RMC has two different user roles, Organization Admin and Project Managers. The Organization Admin will be set-up by the Rumie Staff. They will have full access to their Organization Project, Libraries, Content, and User (Admin and Learner) Management. They will be able to create Project Managers for one or multiple Projects. Project Managers as compared to Organizational Admin will only have permission to access and edit the Project they have been given permission for.
Project View
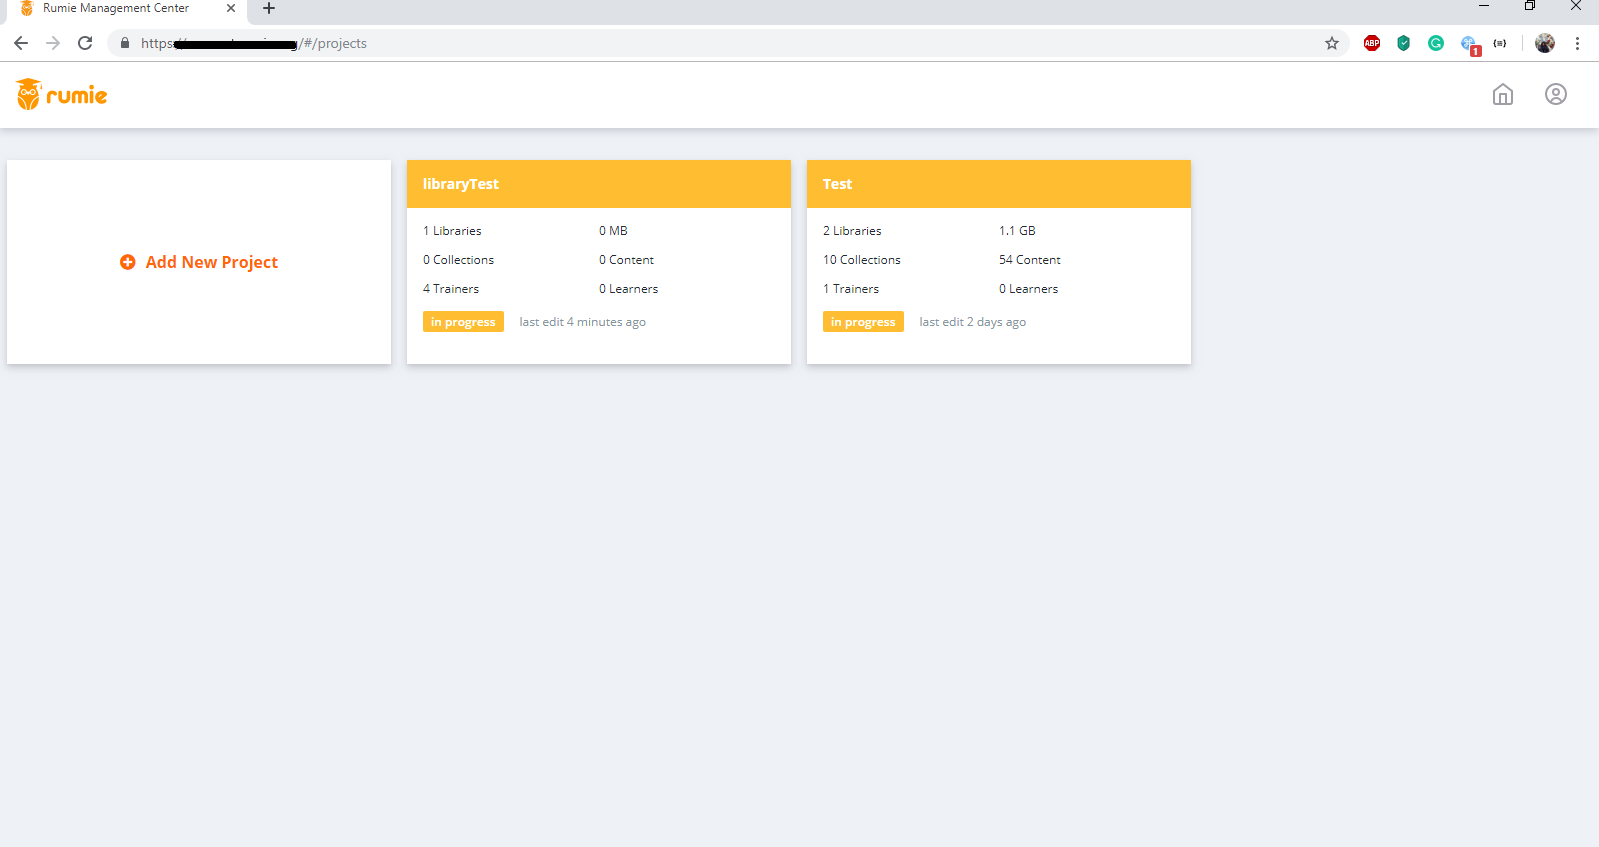
Image of Landing Page in Rumie Management Centre
This is the landing page for the RMC. Here you will be able to see the Projects associated with your Organization. You can create and edit new or existing Projects.
Adding a New Project
- Click on "Add New Project"
- Enter the "Name" for your new Project
- Select the "Internet Connectivity" method. This will affect your sync method when syncing your Project to your device
- Select the device type and the Language from the drop-down menu
- Select the Project timezone from the drop-down menu
- Enter the Project address where it will be taking place
- Enable the toggle for "Require passwords for Learners" if you want Learners to input their passwords to access the project on the App
- Select the timeframe after which Learner selection will be required again
- Click on "Add Project" to finish creating the Project
Steps on how to create a Project in Rumie Management Center
Once you have created the Project, you will be navigated to a new page where you can organize your content and manage learners. The three initial steps are as follows:
- Organize Learning Content
- Manage Admins and Learners
- Control Device and Sync
These three steps are listed on the top of the page, with a status bar which will tell if you have not started/ in progress/ completed that specific step. This will ensure a sequential method of . organizing and managing your Library Content and Users and finally, successfully syncing the project to your devices
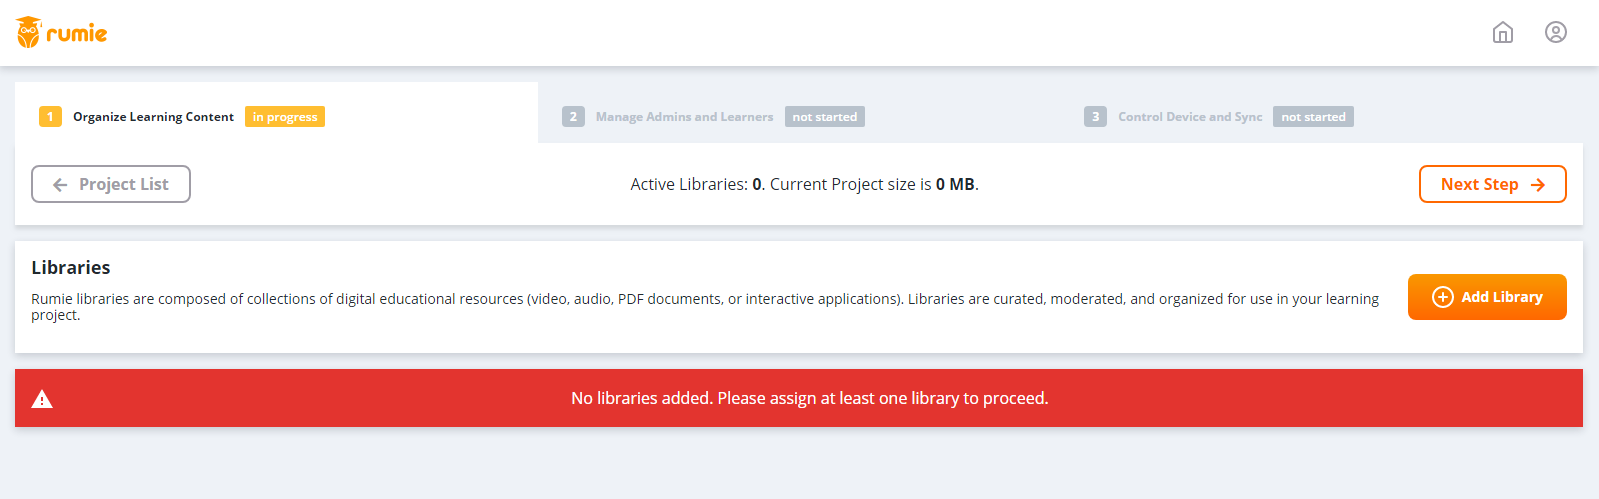
Image of Organize Learning Content Page
This is the page that you will be navigated to when you create a new Project. follow the steps given in the top navigation menu to create and successfully launch your Project.
Step 1- Organize Learning Content
Here you will create Project Libraries and add Content to these Libraries. This page will also list the number of Active Libraries you have, the total Project Size, and if there are any existing Libraries in your Project.
- You can create a new Library by clicking on the "Add Library" button. input a name for your Library in the Name field or clone it from an existing Library one by selecting "Create from existing Library"
- Select "Create Library" to finish creating your Library. Please refer to Regular Libraries vs Cloned Libraries to understand the relationship between the two and when or how you can clone a Library.
- Once you have created the Library it will be listed in your "Organize Learning Content" view. You can click on the Library and add Collections to your Library.
- Please refer to this Adding Collection to Library to learn about the process of adding collections to your Library
Each Library will list the number of Collections, the size of the Library, the time it was last modified, and the Active/ Inactive toggle. The toggle is important because you can choose if the Library is still being used or is redundant. Once you're done adding Collections and organizing content in your Libraries you will proceed to next step of "Managing Admins and Learners" by clicking on the "Next Step" button
Add Collection to a Library
- Click on the Library on you want to add a Collection too. Click on "Add Collection"
- Select "Import from Learncloud" if the collection already exists on Leanrcloud
- A pop-up will appear where you will be able to search public and the collections you have created
- When you searching a place, select if a filter for the collection ("public" or "My" ) to fasten the search
- When you have the collection available to you, select the "+" to add it to the Library
Add Multiple Collections
- Select “Add Collection”
- Select “Import from Learncloud”
- Seach for Collections with the filters “Public” or “My”
- Select the “Add” checkbox for each Collection you want to add
- Click “Add Collection” to finalize the adding of the Collections you desire
- Deselect Collection by re-clicking on the “Add Checkbox” or by clicking on the “Deselect All Collections” button
Add New empty Collection
You can now create a new Collection that is empty
- Click “Add Collection”
- Click on “Add New Collection” link
- Enter a Collection Name
- Click the “Add New Collection” button to complete the action
Once you add a collection, its content is displayed on the right side of your web UI. You can edit the Collection Name and re-arrange the Content of the Collection by dragging and dropping any piece of Content in the Collection. You can also add your own or any new Content to the Collection by clicking on the "Add Content" button and search for the piece of Content you want to add in the Collection.
Add New Content
- Select “Add Content”
- Select “Import content from Learncloud” or “Use Uploaded Content”
- Import Content from Learncloud
- Search for Content with the filters “Public” or “My”
- Select the “Add” checkbox for each content you want you want to add
- Click “Add Content” to finalize the adding of Content to your Collection
- Deselect Content by re-clicking on the “Add Checkbox” next to each Content Item or by clicking the “Deselect All Content” button
- Use Uploaded Content
- Search for Content with the filters "All" or "My"
- Select the "Add" checkbox for each Content you want to add
- Click "Add Content" to finalize the adding of Content to the Collection
- Deselect Content by re-clicking on the "Add Checkbox" next to each Content item or by clicking the "Deselect All Content" button
Step 2- Manage Admins and Learners
Here you will be able to manage your Admins and Learners who will access the Rumie App.
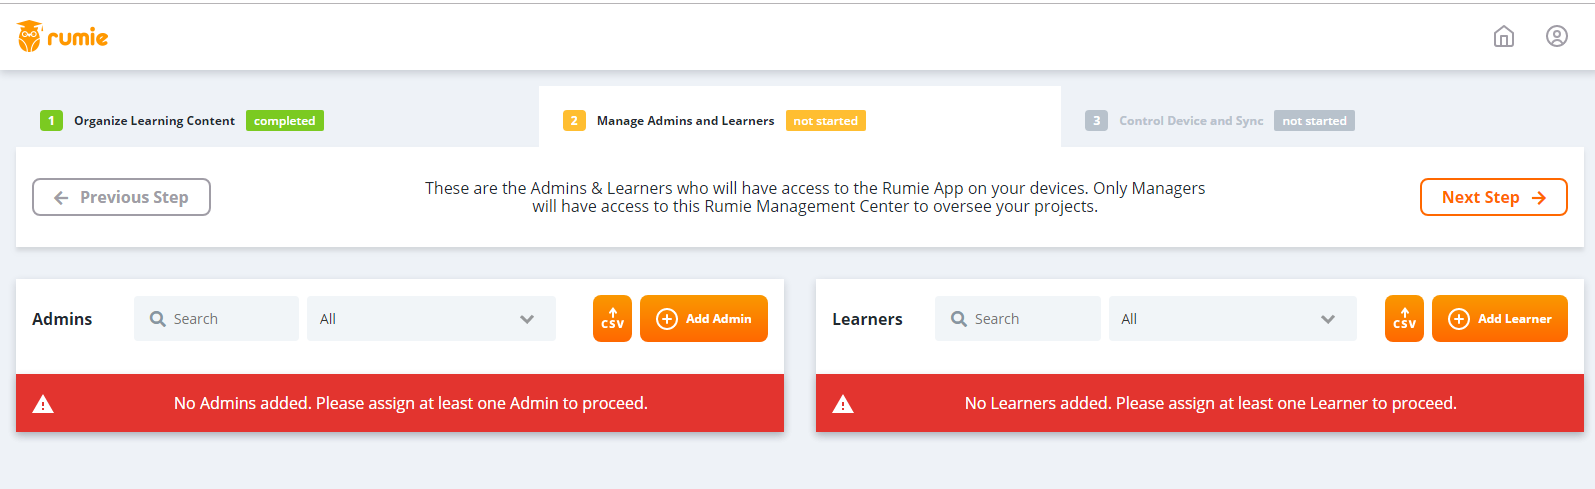
Image of Manage Admins and Learners Page in Rumie Management Centre
The two user roles accessing the Rumie App are Admins and Learners. In theRMC, you can create new Admins and Learners and update or remove existing Admins and Learners. Admins have different permissions than Learners. Please refer to the table below to see the differences between the two user roles
Admin | Learner |
|---|---|
|
|
Admin
- You can create an Admin, either by selecting the "Add Admin" button or uploading a .csv file
- When you click on the Add Admin button it will open an "Add Admin" pop-up
- You can enter the username and password for the Admin
- You need to toggle if the Admin has an Active account and if you want to make them a Project Manager. Please refer to the RMC Roles and Permissions to understand permissions of an Admin when the manager toggle set to ON.
- Click on Add Admin to finish this process
Learner
- You can create a Learner, either by selecting the "Add Learner" button or uploading a .csv file
- When you click on the Add Learner button it will open an "Add Learner" pop-up
- You can enter the username and password for the Learner
- You need to set the toggle if the Learner is Active. By default, the "Active" toggle is set to ON
- Select the Gender for the Learner
- Click on Add Learner to finish the process
**You can use this sample .csv file to add Admins and Learners for your Project. Please make sure the user roles are in two separate .csv files and the username and passwords are in two different columns. The username should not include any spaces. If it does, please delete the space or add a separator "."
Please refer to the article Bulk Loading Admins and Learners
Steps on how to create new Admins and Learners for your Project
Then Click "Next Step" to go on to Control Device and Sync
Step 3- Control Device and Sync
Once your project is ready or if you have made changes to your Content, Admins, Learners or Settings, you must then perform a Sync on your device
Please refer to the Device Sync Process Guide for RMC to understand the methods for performing successful sync.
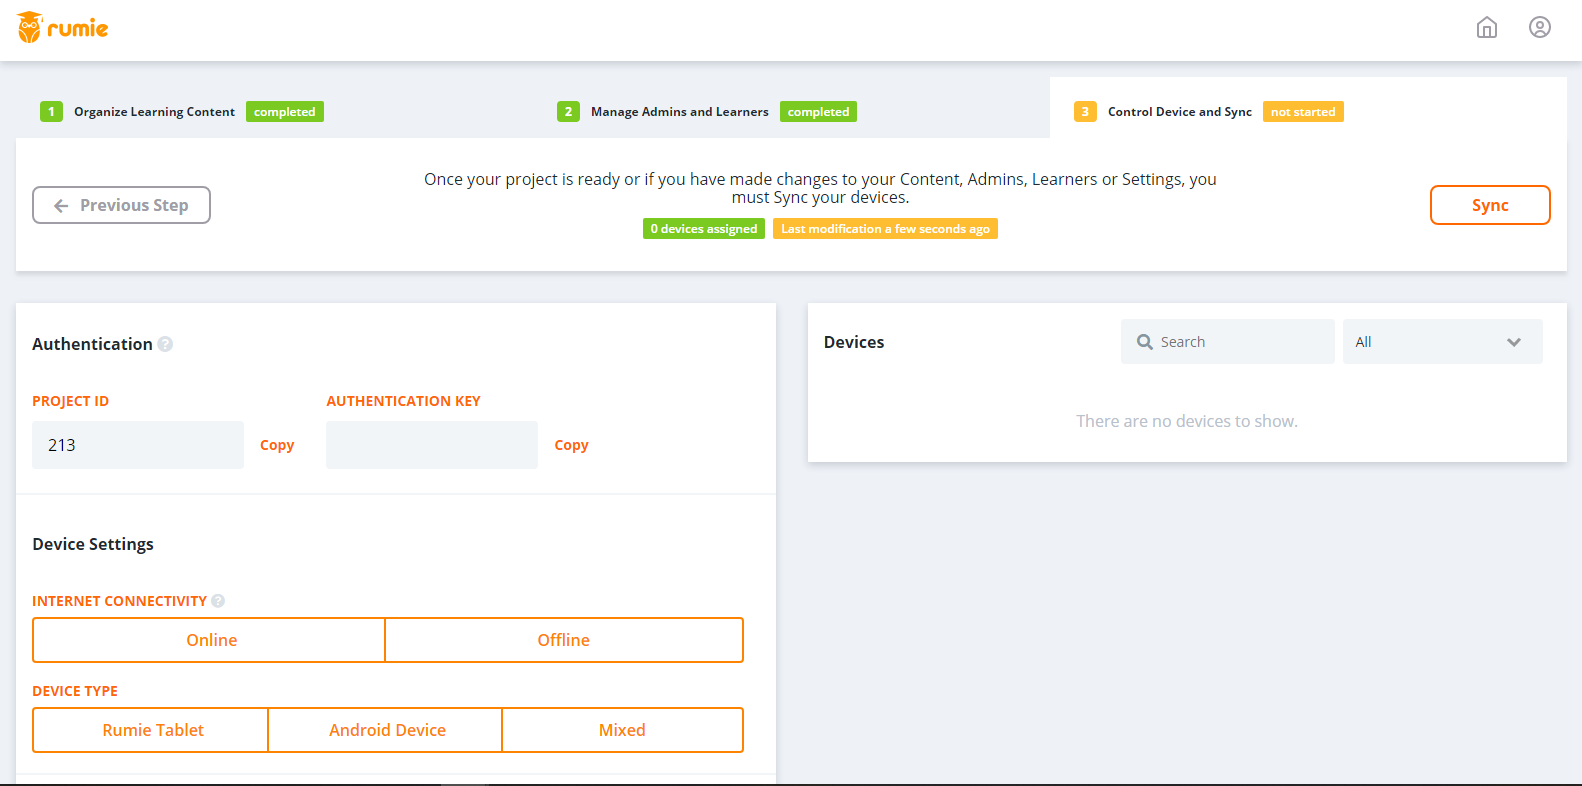
Image of Control Device and Sync Page in Rumie Management Centre
On this page, you will have your Project Authentication and Configuration set-up and your Device information available for when the sync is performed.
Authentication
- The Project ID and Authentication Key will be listed for your Project. This will be required when performing a sync.
- Configure your Project Device Settings
- Select the Internet Connectivity Method which will be used to Sync. If your devices do not have a reliable internet connection then select "OFFLINE"
- Select Device Type. If you're syncing your project to your Rumie Tablets as well as Android devices, then select "Mixed"
- Enable or disable the toggle for "Content Lockdown"
- When the Content Lockdown is ON, students will not have access to freely browse the Internet, access Rumie Tablet settings, or anything else that the Project Admin has restricted permissions to in the Project Library.
- The Tablet Admin can freely access all parts of the Rumie Tablet even when Content Lockdown is ON.
- Enable or disable theAuto Sync option. When Auto Sync is ON sync will be performed periodically. You will have to confirm your device has a reliable Internet connection and has Auto Sync enabled on the device as well.
Device
- The devices you have performed successful sync with will be listed here. This is done to keep track of your devices and which ones have the latest or most updated content of your Project.
Perform Sync
When your Project Configuration is complete, you have to perform a sync.
For Device Sync Methods for the RMC please refer to this document.
If your Project is OFFLINE when you select the "Proceed to Sync" button, your Project will be generated for you to download as a .zip file. You will get a pop-up stating the Project Sync completion and once it is complete you will be able to download your Project .zip file.
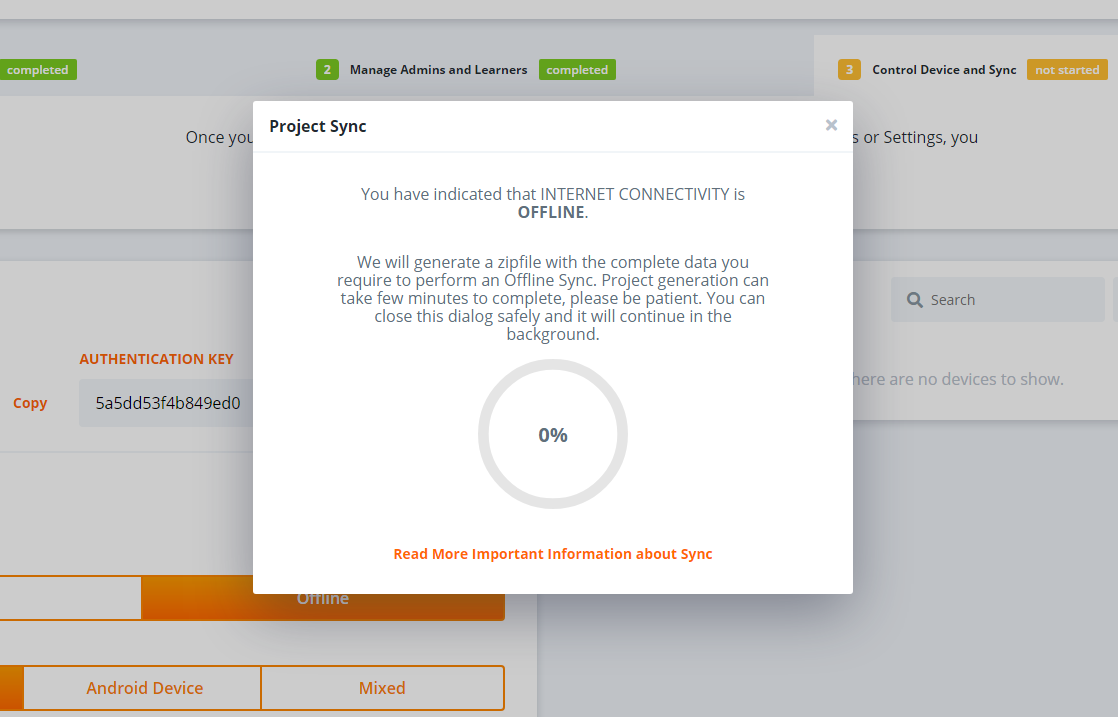
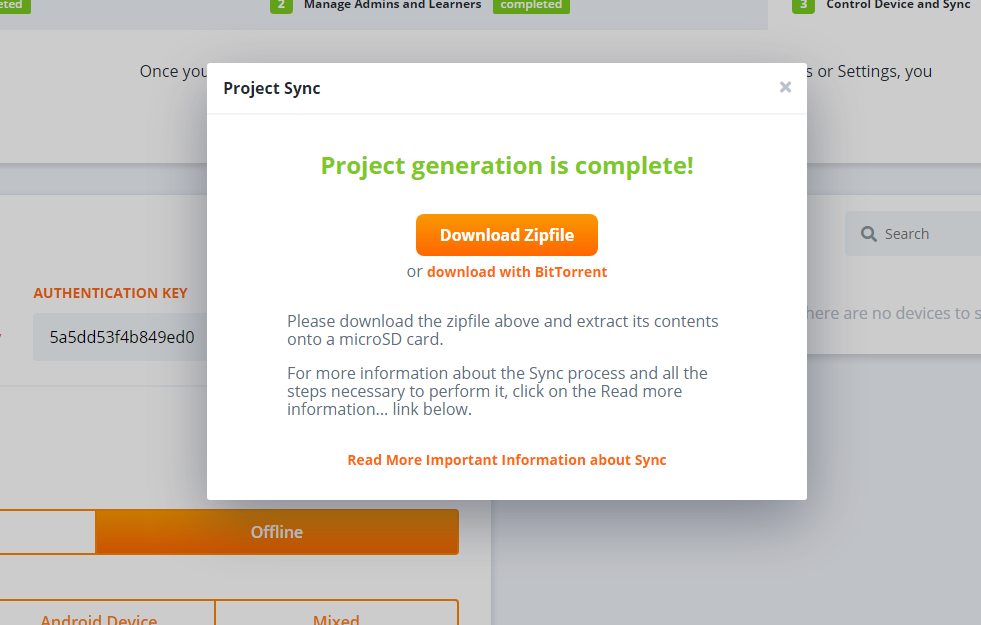
Image of performing an OFFLINE Sync method on Rumie Management Cent
If you have selected your Project Sync to be performed ONLINE. When you click on the "Proceed Sync" button it will perform a sync with your device. Please make sure your device has Wi-Fi Internet connection enabled for the sync to be completed. You will be presented with a Project sync pop-up which also includes a completion bar which will convey to you the progress of the Sync

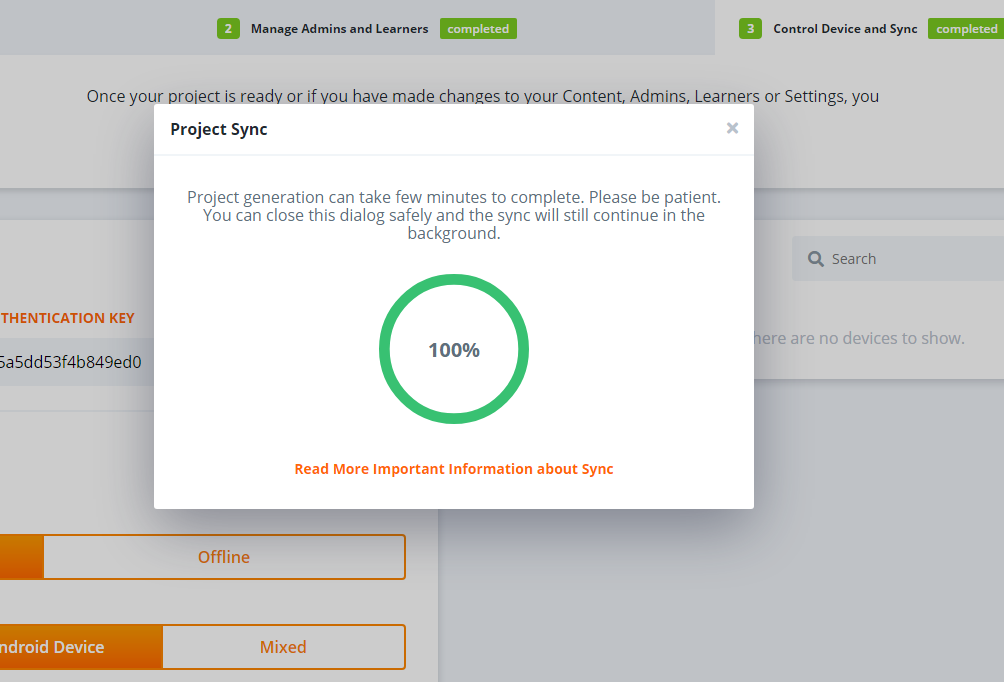
Image of performing an ONLINE Sync method on Rumie Management Centre
NOTE: If you do not have any Libraries in your Project, you will be not allowed to perform a sync. When you reach the "Content Device and Sync" step, you will be presented with this error at the bottom of the page → "Please add at least one Library with content and at least one device Admin to access the Authentication & Sync functionality"
Once you have completed these three steps successfully, you will able to view and access your content on your device and start learning!
Related content
The Rumie Initiative